Display migration (MD4 to MD5)
New features for IQANdesign 7.05.25
It is now possible to drag and drop one or more display pages from one display
master to another, even if they do not have the same screen size. This can be
useful if you want to change display size in a project, or need to switch to a
different display type.
To do this you add the new display to your application and then drag and drop the pages you want to move from the old display container to the new.
A scaling option dialog box is displayed when display page(s) are dropped.
Select how you want to scale size and position of the display page controls and click OK to continue.
Move display pages between different displays:
Most controls will be resized, except for controls using bitmap images; i.e. BMP, PNG and JPG.
To help with this another new feature is introduced.
This is the ability to export multiple images and also replace multiple images.
To export multiple images in one operation, select one or more image groups,
right-click and click Export images. A dialog box is shown where you can
select a folder to export the images to. In that folder there will be one folder
for each image group created and then each groups images is exported to its
respective folder. Folders are named after their image group and image files
after their image name.
Images from the image library are not exported.
It is possible to export all images in the project in one operation by selecting
the Images node in the project manager, right-click and click Export images.
Export pictures:
Resizing images is not a built in feature.
There are many options for doing this.
One option is to use ImageMagick, it is a free tool.
With this you can use the command prompt together with a .bat file to resize all the images in the selected folder.
The easiest way is to place the bat file in the same folder as all the images and run the command with . as the path.
It takes three arguments, the first is the path to the files and the other two are the scaling in % in the X and Y directions.
ResizeImages.bat . 150 150
The above operation will resize all images in the folder and sub folders the .bat file is located to 150% in both X and Y.
Keep in mind that this type of resizing is not perfect.
The images can become blurry with this type of operation.
For best results the images needs to be redone in the correct size.
Link to both ImageMagick and the .bat file at the bottom.
Resize pictures:
To replace multiple images in one operation, select one or more image
groups, right-click and click Replace images. A dialog box is shown where
you can select a folder to read new images from. The selected folder must
have the same structure of folders and files as the one created when exporting,
see previous section.
It is possible to replace all images in the project in one operation by selecting
the Images node in the project manager, right-click and click Replace images.
Replace pictures:
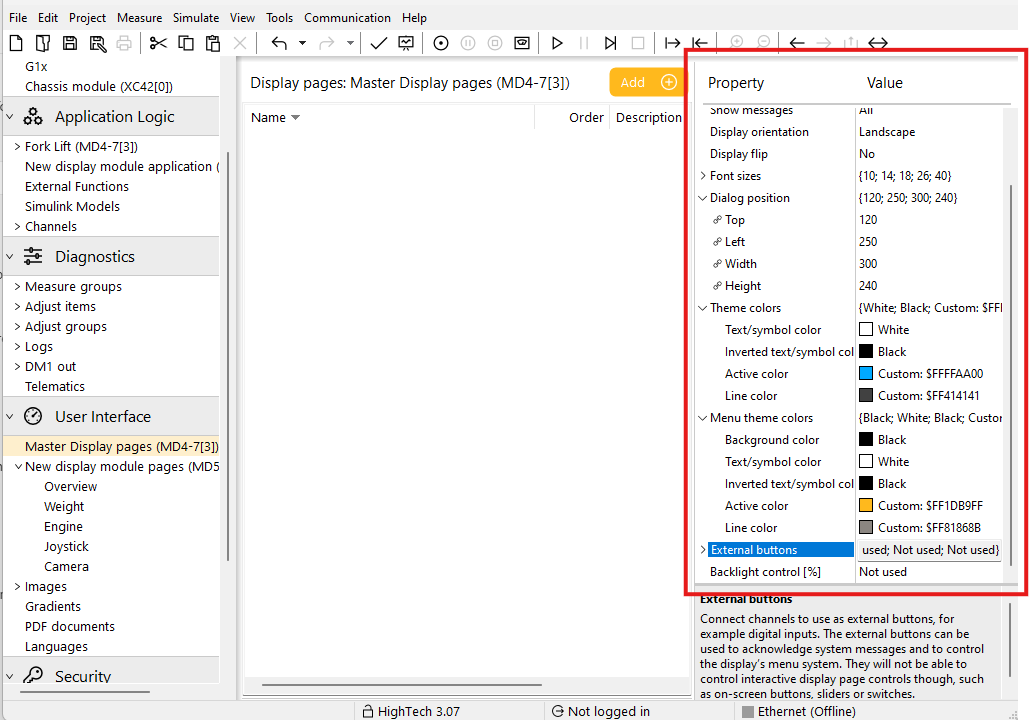
Keep in mind that the property for the display is not transferred.
Things like font size, theme colors, menu theme.
This needs to be done manually.
Set display container property's:
For a full replacement of a master display in the application you also need to move the application over from the old master to the new one.
Do not copy the application part over, use the select all and drag the application part over from the old to the new.
If you move the application it will keep all links to the display pages.
If you use copy all the links will still point to the original.
All logs also needs to be moved from the old master to the new, except for the system log.
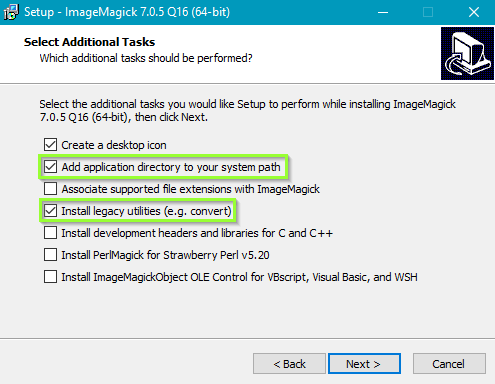
https://imagemagick.org/script/download.php#windows
When installing ImageMagick make sure to include the legacy utilities.
Customer support service by UserEcho
